Storing Children’s Art
We cannot save everything our child makes, but they are only four once, and their drawings and paintings at these young ages are a record of their growth. Saving their art inevitably means implementing a sorting and storing system. Here are three tried-and-true storage ideas that we know will work.
First, the sorting system:
Imagine you are making four piles…
1. The first pile is for pieces you want to frame or hang up.
2. The second pile is for keepsakes and art pieces that you want to save. (Note that sculptures and 3D works should almost always be photographed and then tossed after a period of display in the house. Unless it’s ceramic or museum worthy.)
3. The third pile is for collage material (things that can be cut up and used in future art making).
4. And the fourth pile is for the trash bin (but your child never has to know this!).
We can get rid of two piles easily—the collage material pile goes off to a box in the art room, and the trash pile gets trashed. Now we are left with two piles. Realistically, that “to frame” pile could sit and collect dust for a while. It might be better to tape these pieces up or hang them on a clothesline right away. You can always go back and frame them later.
That leaves us with the save pile. Here are the best ways to store these works of art.

Now, the storing system:
1. Make paper bag portfolios
Make portfolios by using a paper grocery bag. Cut down the side and cut off the bottom, then tape together. You can keep the sides of the portfolios open, or you can tape them closed like a pocket. You can assign one portfolio per year, or just fill as you go and write the dates on the front.

You can store the portfolios flat under a bed or in a closet, or you can purchase a magazine stand and place it in the art area for easy access and quick organizing.

2. Store artwork in big boxes
Saving artwork in boxes is practical. Boxes can be moved around easily, can be sorted by year, can be piled on top of each other, and can be bought with acid-free, archival linings. Search online for “archival storage box,” “garment storage box” or “art storage box” and you will find many options. Choose something that comes close to 18” x 14” so you can store the big paintings that sometimes come home from school.

Keep the boxes close by, like in an office or a family room, so you can easily slip things in during the week. You can even use the boxes to collect and save other keepsakes like handwritten notes.

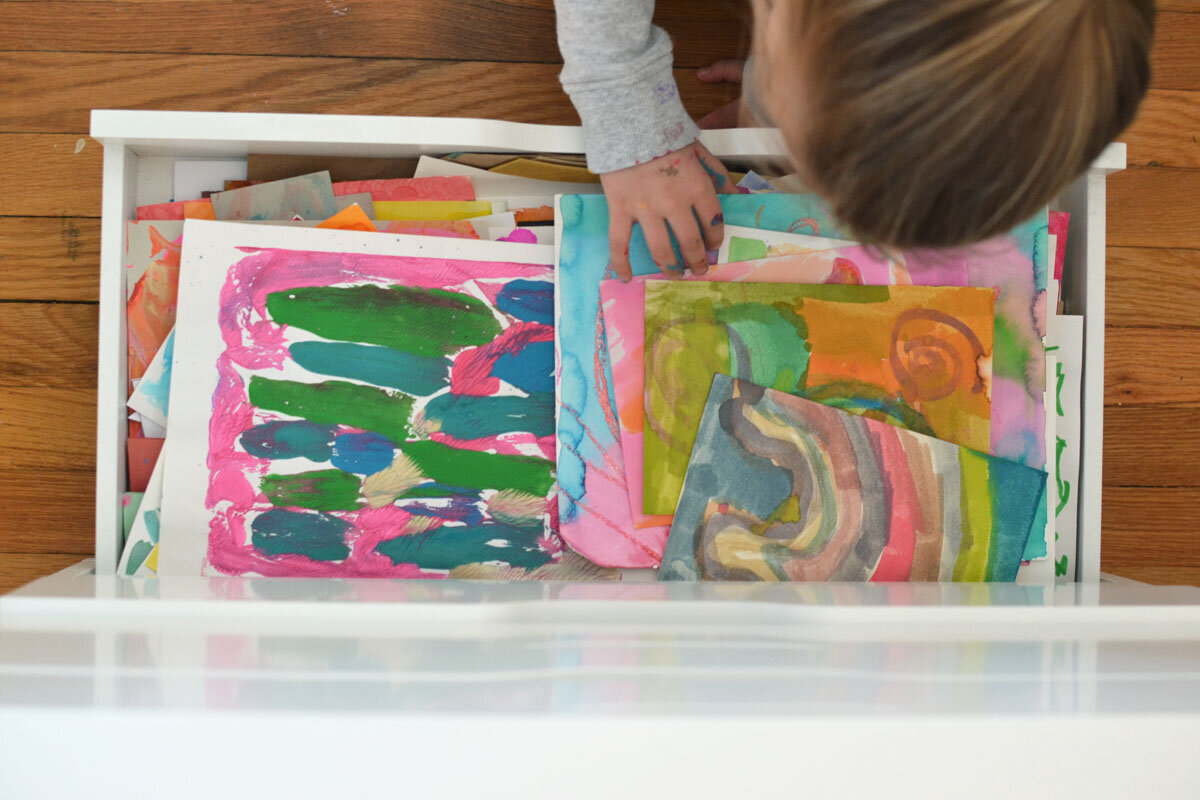
3. Store art in a chest of drawers
Designate an old dresser, or buy an Alex drawer from IKEA and give each child one drawer (depending on the size of the dresser). This is an even more practical and easy way to store than boxes. It doesn’t have to be as organized, you can simply open the drawer and throw in the artwork or keepsake. Always remember to put name and date on the back!

You can always implement more than one of these ideas. You can use the paper bag portfolios to store the daily artwork to sort later, and boxes or drawers for the stuff you want to save forever.
Remember to always write your child’s name and the date on the back of the artwork. If you have multiple children and they don’t write their name anywhere, it’s easy to forget who made what. And the date will be so important as they grow so you can look back and remember their age!
Do you need help reimagining your classroom as a hub of creativity where children share ideas and feel seen, known, and celebrated? Learn more about our Materials Matters course and Professional Learning Workshops and transform your creative practice today.